12 Tips for Living Well in Your Loft or Studio
12 Tips for Living Well in Your Loft or Studio
Short on storage? No separate bedroom? Here's how to maximize space and turn your loft or studio into a home that suits you to a T
|
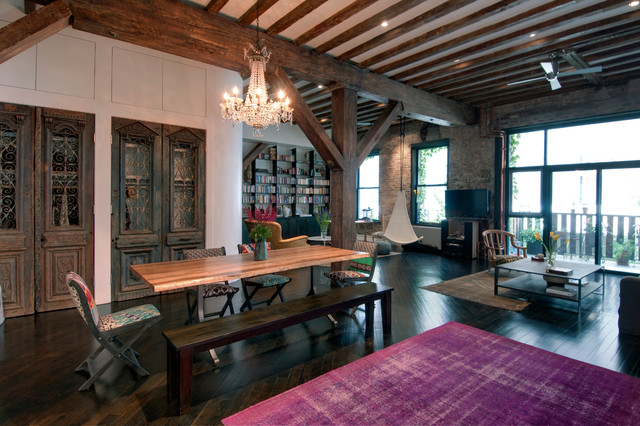
1. Plan a cohesive color scheme. When
you can see your entire living space in one sweep of the eye, having
colors that all work together is key. There is something about looking
at a space where the colors are in harmony that makes the entire space
feel neater, cleaner and more pulled together.
2. Consider how your furniture goes together. An eclectic look can work well, as long as it's intentional — having a tight color scheme, as described above, helps. If you are feeling unsure, sticking with one furniture style, like midcentury modern, is a great way to pull your whole space together. |
|
3. Use lighting at different heights. Use
pendant lights hung lower where you want to create a more intimate feel
— over the dining table and over a sitting area, for instance. Hang
them higher in more "public" spaces like the entry hall and kitchen work
zones.
4. Define "rooms" with area rugs. It's one of the oldest tips in the book, but it's still worth repeating because it works. The most common mistake is using area rugs that are too small for the space. Ideally, choose rugs large enough that all of the furniture in the arrangement fits on top of it; you can always layer a smaller rug on top to add color and softness. In the dining room, get a rug big enough that you can pull your chair out from the table without bumping over the edge of the rug. 11 Area Rug Rules and How to Break Them |
|
5. Set up proper storage. Closets
tend to be in short supply in lofts and studios. Build in your own
storage by taking over one entire wall for the purpose. Fill the wall
from floor to ceiling with shelving, cabinets or closets. Even if the
cost seems high, this is something that makes life easier and more
pleasant every day, so it's well worth it in my book.
|
|
6. Divide space with open-backed shelving.
One of the easiest ways to create a room-within-a-room is by using
open-backed shelving placed perpendicular to the wall — and it works
equally well in small and large spaces. The trick is to arrange open
shelving so that it looks good from both sides. Stack books horizontally
rather than vertically; place items in baskets that look good from all
angles; and mix in plenty of pretty objects such as vases, candles and
bowls. Also be aware of safety: if you have young children, or live in
earthquake country, you will need to secure the shelving to a wall
and/or the floor.
|
|
by Studio Garneau
»
|
|
8. Use innovative, flexible furnishings.
When space is at a premium, smart, space-savvy designs are here to
help. Think fold-up Murphy beds, disappearing pocket doors, modern sofas
that convert to spare beds and adjustable height tables for dining and
lounging.
|
|
by Studio Garneau
»
|
|
With the Murphy bed and sliding
door shown in the previous photo folded away, this petite studio
apartment manages to look light and spacious — and allows the bed space
to be used for another purpose.
|
|
by mango design co
»
|
|
9. Choose the right scale. Appropriately
scaled furniture can make the difference between a space that feels
awkward and one that feels comfortable and homey. In a small space,
choose the largest pieces you can while allowing ample room to walk
around them. Pieces that are too small will only feel uncomfortable. In a
large space, go bigger with the furniture — but keep it human-scale.
Some sofas and chairs on the market today are so humongous that an
average person is swamped sitting in them!
|
|
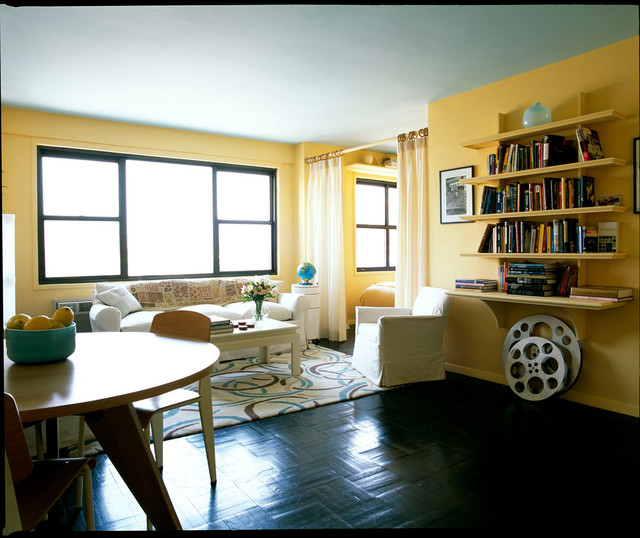
11. Use curtains to soften edges and create privacy.
Hang curtains to create a room where there is none, bringing privacy to
the bedroom area or creating a more intimate sitting room. You can also
cover large expanses of windows with floor to ceiling drapes that can
be pulled shut for warmth and privacy or opened to let the light flow
in.
|
|
by Adrienne DeRosa
»
|
|
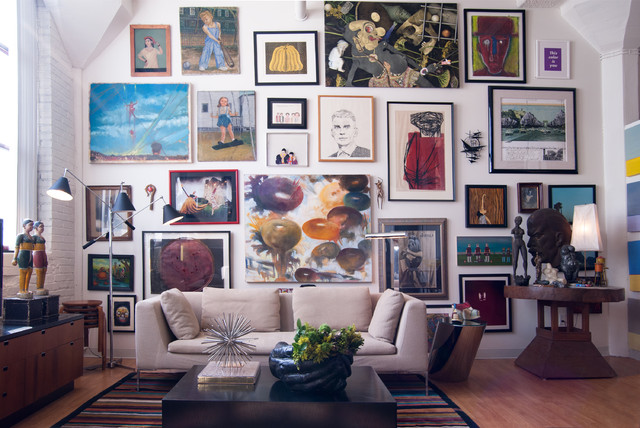
12. Take advantage of ample wall space with a gallery wall.
A huge wall can be daunting, but it also provides a great opportunity
to make a style statement. You don't need to fill the entire wall at
once. Start building your arrangement from the center out, and you can
continue adding to it over time until the wall is happily full.
|


