How to Set Up a Craft Room
If any of these scenarios sound like a page from your life, then it’s time to think about setting up a craft room. It doesn’t have to be anything fancy or even occupy an entire room. It would simply be a designated, well-organized space where you can create in peace.
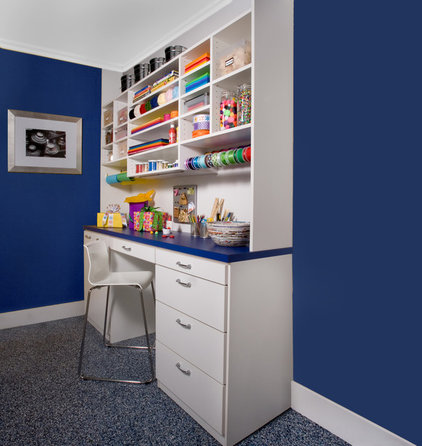
“A craft room gives you the ability to see your supply paper, ribbons and bows at once and keep them all within easy reach,” says home storage designer Andreas Messis. “Having a designated area for your crafts and projects creates a stress-free zone to work in that also preserves the other areas of your home from your craft clutter.”
If that sounds like heaven to you, this ideabook can help.
But if you’re like me and your closets perpetually look like a bomb went off in them, you might want to call for some professional help. If you’re dealing with a blank canvas, a design pro from a custom storage and organizing company can help you make the best use of your space.
If you don’t have the desire or budget to fully design a space, a professional organizer can help you avoid getting lost in a pile of art paper or upholstery swatches. He or she can help you find a place for all of your precious supplies — even that messy pile of remnants you know will come in handy someday.
Project length: One day to organize, and one additional day if you’re working with a pro to install custom built-ins.
If you’re doing this yourself, you might also consider spacing it out over a weekend, as you’ll likely spend several hours sourcing and purchasing the jars, boxes and organizers you’ll need to keep the space neat.
Find storage designers on Houzz
Project considerations: You’ll need to start by considering two major factors: how much workspace you’ll need and how much stuff you have.
“Storing and organizing a great variety of small items is usually the challenge,” says Messis, co-owner of transForm, a closet and storage design company. “Art and craft supplies as well as small tools add up fast and take up a lot of space.”
Messis also warns that projects done as part of a large space — like a playroom or an office — often cost more, as the whole room needs to be redesigned to accommodate the craft space.
1. Consider your workspace. You’ll need a large, sturdy, easy-to-clean surface that enables you to spread out while you’re working on a project. Consider not only the size of the room, but also the kinds of projects you like to take on. You’ll also need ample lighting. If things are looking a little dim, brighten them up with an LED desk or a floor lamp, or ask your pro for a custom solution.
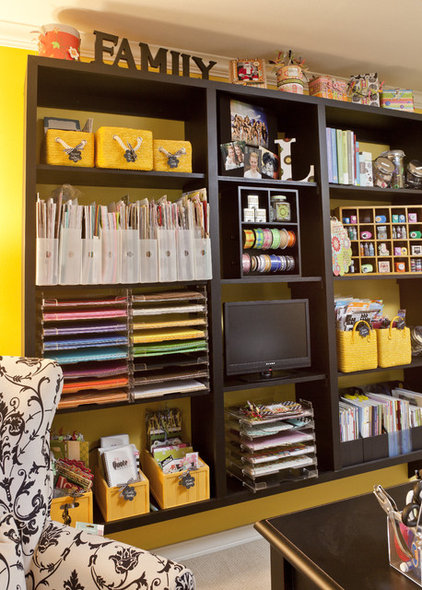
2. Designate storage space. While a closet is the obvious place for hiding messes, not every space has enough storage. Neat Method‘s Heather Byrne suggests buying a small piece of furniture with cubbies, shelves or drawers if storage space is lacking. The key is to keep supplies accessible — ideally within arm’s reach of your work area.
Messis suggests using a horizontal rod to hang wire, ribbons, sheets of paper and spooled supplies on. Also “incorporate ample space into the design to store flat sheets of paper, such as construction paper and drawing paper,” he says. He loves divided drawers for organizing small tools, and suggests making sure your shelves are adjustable to accommodate all sizes of jars and boxes.
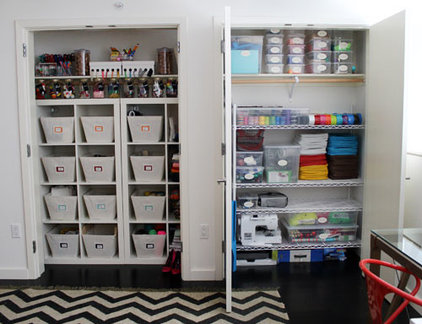
Neat Method attacked this space by separating like items into piles. “From there we determined what items needed to take priority space on the shelves and how many cubbies would be needed for each,” says Byrne. “We more or less essentially prepped each space of the closet with items, so we could get an accurate picture of space layout.”
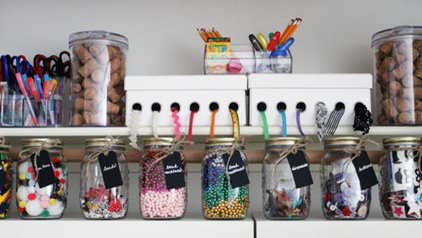
4. Choose and label containers. Once a home was found for each item, Neat Method created a list of organizational solutions to keep the space clutter free and easy to maintain. “We implemented labeled bins, jars, ribbon boxes and a few acrylic desktop organizers for everyday craft supplies to help streamline the crafting process,” says Byrne.
She points out that these supplies don’t have to be expensive. Target, Cost Plus Word Market, The Container Store and The Organizing Store are some of her favorite sources for affordable supplies. “There are also so many ways to creatively organize crafting supplies with items from around your house. For example, use old jam jars instead of buying new ones,” Byrne suggests.


